Posts

Wrapping Up the Pattern: Lasercut
Image
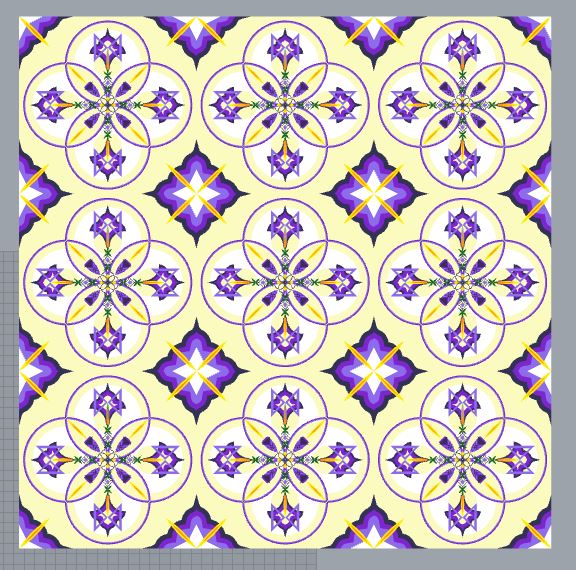
  As pleasant as this pattern was visually, there was just NO WAY it was going to be replicable within 4x4" - it was just too detailed with some really minuscule elements that didn't carry across rescaling.  Once that was clear, I spent a class redesigning the pattern, from its original inspiration sources, into something familiar to the above concept but lasercut-able.  Knowing it was going to be cut from its background, but also that it could only be coloured through burning, I worked to those limitations/ possibilities. I reworked the pattern so that it would also work in greyscale, and then set up a series of small delicate lines and rings that would be hard to fashion without the precision of a laser. Paper or softer plastics would be floppy, so it was important to me that the wood's faktura would be appreciated instead of overlooked.  The red lines indicate where the laser would cut - knowing that wood could stand some carving out, I really leant into those fra...

Not an Engineer

Image
First off, I love the digital calipers. I now have illimitable measuring power in my hands. That being said, it's really clear that I am not, nor should ever be, an engineer. I mean, look at these notes.  Normally, I would rewrite all my notes to be pretty and legible for everyone else, but that hasn't been an option this time.  this is where we wanted to end up This is how I started - by knowing I was going to use revolve for SO MANY things.  The arc calculator saved my life by figuring out the angles needed to produce certain arc lengths. I extruded this shape and removed it from the hoops I had created around the flashlight handle to create the grid grip.  The inner reflective assembly The final product.  The time I could give this project was pretty limited - I really wish I had had the time to create the indents around the mouth of the flashlight, but as I had to miss last class, I really didn't know where to start on such a complex shape. I also wish I cou...

Reverse Engineering A Meaning

Image
It's time to start heading into our next big project - Reverse engineering.  That also means it's time for some process- the process of selection.  We have been asked to select three objects which will be taken apart, measured and then reassembled via CAD. It behooves me to pick an object with some measure of interactivity, mechanization and meaning, as well as estimate the level of complexity that I can complete within the project time frame.  We really turned the house upside on this one - I was going through boxes of stuff looking for something old enough to be mechanical instead of fully digital, and unprecious enough to spare through disassembly.  As the firstborn, my Mom kept so many things from my childhood - some wonderful and fun, and some more sobering and odd. Like this nebulizer mask - it has to be at least thirty years old, but clearly it made an impact on my mom - enough that she tucked away one into a box of my childhood toys. It fits together, but I w...

Patterns in Life

Image
At first I wasn't sure I was going to be able to find enough surface design patterns around my house to get a good sample...but once I started looking I kept finding more and more.  Love this shirt on my partner - did not feel like I had enough time in my life to attempt to replicate it though This pattern was neat but too organic to replicate at my skill level After locating the samples, I booted up rhino and began to attempt to replicate the patterns I had found, starting with the simpler patterns that drew my eye.   the pattern from our laundry basket and some variations tessellation inspired by my mask's beadlike flowers based on the carved candle holder exploring Pendleton-like designs  a floral motif from a plate After replicating sections of designs, I started to have a concept - of integrating some of the disparate elements of my life together. As a biracial person, both Indigenous art and western art are parts of my life and experience - and I am capable of ...

Castles in the Sky

Image
 Welcome to this semester's Object Design class! Our first assignment was to refresh our knowledge base, dust off the old brain and create a castle using basic processes or what we could remember. I had an inkling of a concept before I started, and that was helpful.  I remembered how to make a "globe" and was fascinated by the interior structure from above.  I remembered how to copy and rotate which was really helpful for putting the rings and towers around the globe.  I wanted a feeling between built and precise - as human we tend to build to less than perfection - so I made the door arches and connecting ruts with semi-haphazard intervals.  And I made a little tower centre/ spindle for the castle to rotate around. I always enjoy switching from wireframe to shaded - it's like a little pay off for your work so far.  And then the finished product. I remembered how to set up textures, and a rendering environment so I am pretty happy with my brain - good job r...

Milestones, baby!

Image
  Here we are at the end of the semester Winter 2021, considering our last class of OBDF 110a and our futures. We came together in this class for a multitude of reasons, and are leaving with an even greater number of skills and solutions. Let's look back over the semester as it pertained to me and my projects.  1) The Objectified Response I was aware that there was a large breadth of design processes, individualized to people and companies but I'm not sure I was ready to have so many downloaded into my brain at once. Regardless I sifted through the various approaches until I found one that gelled with me. Then I applied that to a problem in my own home to design a solution that I still think is very elegant for someone with no experience in CAD and very little experience in 3d design.  The largest challenge here was getting TOO much help from my partner who was very interested in my homework and kept trying to solve the design problems for me. We solve things very differe...